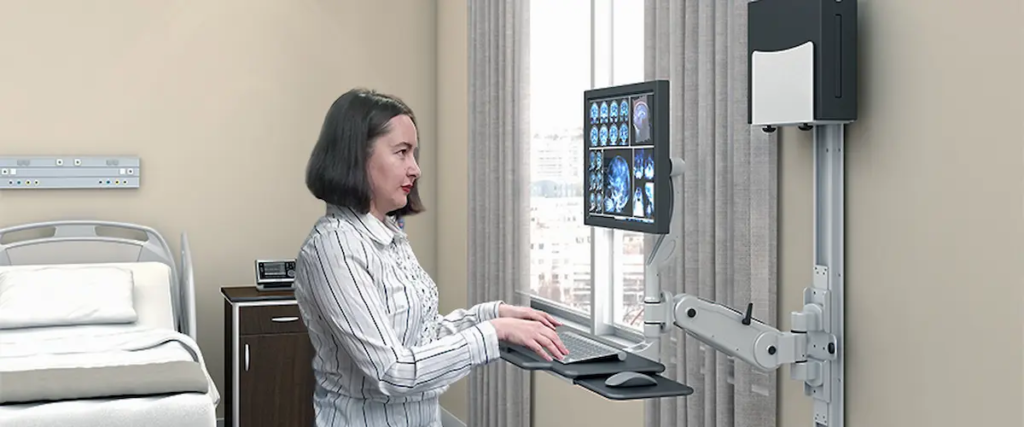
Top Track Mounts System for Flexible Workspaces
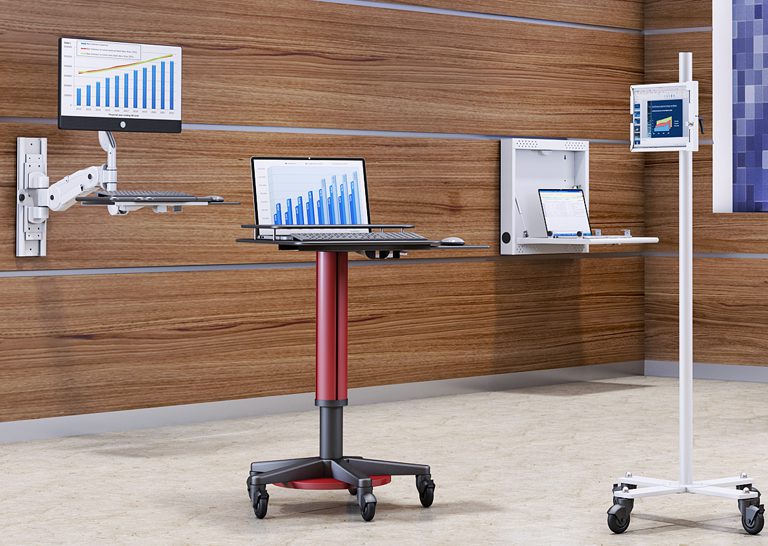
Top Track Mounts System for Flexible Workspaces Introduction Track mounts are modular rail systems that let you reposition monitors, shelves, and accessories without drilling new holes. In today’s flexible workspaces, they’ve become essential hardware for adapting quickly to changing needs. This guide covers wall mount track systems, installation processes, and practical applications for modern offices. Whether you’re an office manager redesigning a hybrid workspace, a facility planner optimizing layouts, or a remote worker near College Point, New York seeking better ergonomics, this content speaks directly to your challenges. Quick answer: Track mounts are secure, adjustable mounting solutions that allow quick reconfiguration of workspace elements—perfect for businesses that need flexibility without constant renovation costs. What you’ll learn: How track mounts optimize workspace flexibility Key differences between track systems and traditional mounting Step-by-step installation guidance Solutions for common mounting challenges How to choose the right system for your needs Understanding Track Mount Systems Track mounts consist of rails or tracks affixed to walls or ceilings, supporting slide-in components like monitor arms, shelves, and panels. They’re designed to make workspace changes easy and cost-effective. Wall Mount Track System Fundamentals A wall mount track system includes four core components working together. First, the track itself—typically aluminum or steel—serves as the structural base. Second, anchors and brackets secure everything to your wall. Third, carriers or trolleys slide along the track to hold your equipment. Finally, accessories like monitor arms, shelves, and cable management trays complete the setup. This modular approach connects directly to workspace flexibility. Instead of fixed positions, you can slide components to new spots instantly. Wall Mount Track vs Traditional Mounting Traditional mounting means drilling holes for every bracket and position change. Track systems, however, eliminate this hassle entirely. Once the track is installed, you reposition items freely without touching a drill again. Additionally, track mounts support better ergonomics. You can adjust monitor height and distance to reduce neck strain—something fixed mounts can’t offer as easily. While initial costs may be slightly higher, the long-term savings from reduced renovation work make them the smarter market choice. Now, let’s explore the specific types of track systems available for your workspace. Types of Track Mount Systems for Workspaces Building on those fundamentals, different track systems serve different purposes. Your choice depends on what you need to mount and how much weight it carries. Wall Mount Shelf Track Systems Wall mount shelf track systems excel at flexible storage solutions. You can add, remove, or reposition shelves without creating new anchor points. Heavy-duty brackets can support 100 to 300 pounds each when properly anchored into studs. These systems work particularly well above workstations where storage needs change frequently. They’re compatible with various shelf materials and integrate seamlessly into existing office aesthetics. Control Track Wall Mount Options Control track wall mount systems handle technology integration elegantly. They support adjustable monitor arms, keyboard trays, and control panels that slide horizontally along the track. For example, some systems allow vertical travel up to 28 inches while supporting 90 pounds between anchor points. This makes them perfect for workstations where multiple people share equipment at different heights. Heavy-Duty Wall Mount Track Solutions When you need serious load capacity, heavy-duty track solutions deliver. Industrial-grade steel tracks can support up to 200 kg per meter—roughly 440 pounds. These work in broadcasting studios, medical facilities, and manufacturing environments. At Ergoville, we offer track mount options designed for demanding workspace needs, combining durability with the flexibility modern offices require. Installing Track Mounts in Flexible Workspaces With your track type selected, installation comes next. The process is straightforward when you follow proper steps. Installation Process For lightweight display tracks, DIY installation works fine with basic carpentry skills. However, heavy-duty systems carrying significant loads should involve professional installers—especially in commercial buildings where structural integrity matters. Follow these steps for successful installation: Plan and measure – Identify total load requirements and locate wall studs or structural backing using a stud finder. Mark level lines with a laser level. Select compatible hardware – Choose tracks rated for your weight needs. Ensure anchors match your wall type—wood studs, masonry, or concrete each require different fasteners. Mount the track – Install brackets first, spacing them 16 to 18 inches apart for standard loads. Attach the track, ensuring everything stays perfectly level. Add carriers and accessories – Slide in trolleys, monitor arms, or shelves. Adjust position and height for optimal ergonomics. Test your configuration – Apply expected load plus a safety margin. Check for deflection, looseness, or alignment issues before finalizing. Track Mount System Comparison System Type Load Capacity Installation Complexity Price Range Flexibility Light display rails 20-50 lb/ft Low (DIY) Budget High Heavy-duty picture rails 70-110 lb/yard Medium Moderate High Industrial roller tracks Up to 90 lbs/4 ft span High Premium Very High Ergoville track mounts Varies by model Medium Competitive Excellent This comparison helps you choose the right vehicle for your specific needs. Explore our limited special offers for current pricing on professional-grade systems. Common Track Mount Challenges and Solutions Even the best systems face installation hurdles. Here’s how to solve them. Inadequate Wall Support Drywall alone cannot support heavy loads—period. Always anchor into studs or use backing plates behind the drywall. For masonry walls, use appropriate concrete anchors rated for your weight requirements. When uncertain, consult a professional to assess your wall structure. Track Alignment Issues Misaligned tracks cause carriers to bind and create stress points. Use a laser level—not just a spirit level—for long installations. Install in sections, aligning joints carefully, and add brackets at every joint location. Load Distribution Problems Clustering too much weight in one spot overloads carriers and causes sagging. Distribute equipment evenly across the track. Also, apply a 2:1 safety factor when calculating capacity—if you need to hold 50 pounds, choose a system rated for 100. Conclusion and Next Steps Track mounts transform rigid workspaces into adaptable environments. They reduce renovation costs, improve ergonomics, and support the flexibility modern offices demand. Your next steps: Assess your current workspace mounting needs Measure wall dimensions
Top Track Mounts System for Flexible Workspaces Read More »